3 Easy Holiday DIY Decorations


Even if you’ve never fancied yourself a DIY-er, you may be feeling a little extra festive this year. What better way to dive into the holiday season than with some easy holiday DIY decorations with the kids? The reason we suggest including them is because these crafts are so easy and fabulous, if you’re not already an accomplished crafter it’s likely no one would believe you made them.
3 Easy Holiday DIY Decorations

-
Sugar Cookie Garland
Making a garland cookie string couldn’t be easier. Simply whip up a batch of sugar cookie or gingerbread dough.
- Use a rolling pin to roll out dough to about 1-cm thick.
- Use a star-shaped cookie cutter to cut shapes from the dough.
- Carefully transfer to a parchment-lined baking sheet.
- Use the tip of a skewer or toothpick to poke a small hole in the top of each star.
- Bake in a 350 F oven until set and golden around the edges.
- Remove from oven and let cookies cool.
- Then use a piping bag with royal icing to spell out any words you like (think ‘Merry Christmas’ or ‘Happy Holidays!’).
- Once icing is set, use some festive ribbon or twine to string each cookie together in a row.
Hang on a wall for an irresistible foodie-inspired decor idea your kids will love!
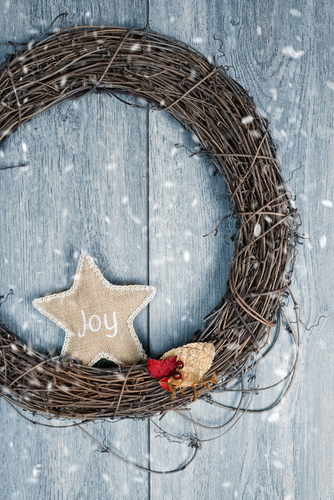
2. Twig Wreath
All you need for this simple, yet one of our favourite holiday DIY decorationst is a) a twig wreath (sure, you can make one but when they are readily available everywhere we say, why bother?), b) some cute holiday decorations and c) a string of tiny lights.
Start by placing your twig wreath on a flat surface. Then, wrap your string of lights around the twig wreath. Finally, use a bit of twine or a glue gun to secure decorations to the wreath. Sound easy? It is. And there is an added bonus: This is a fun family tradition that you can repeat year after year to create a brand new wreath for your entranceway!
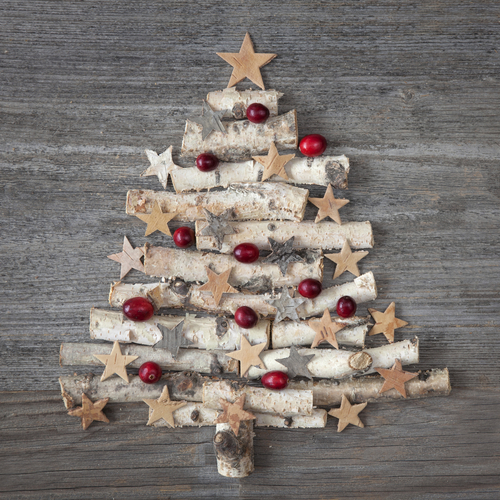 3. Wooden Holiday Tree with Berries
As far as DIY decorations go, this shabby-chic wooden holiday tree looks a lot more complicated than it is.
Start with a square-shaped, flat wooden board. This will act as your base.
Collect small pieces of bark-covered wood and brush off any dirt.
Cut out stars from a piece of card-stock, cardboard, or even a box. Use a variety of different colours if you like, or stick to a fairly monochromatic scheme as we have done here.
To assemble, use a glue-gun to secure the pieces of wood to your base board in the shape of a tree. Don’t forget the trunk! Then secure your cut-out stars, fake cranberries, and even little silver balls (if you like) to the pieces of wood.
Let the glue dry. Now you have created a rustic shabby-chic piece of art that can be hung on any wall throughout the holiday season!